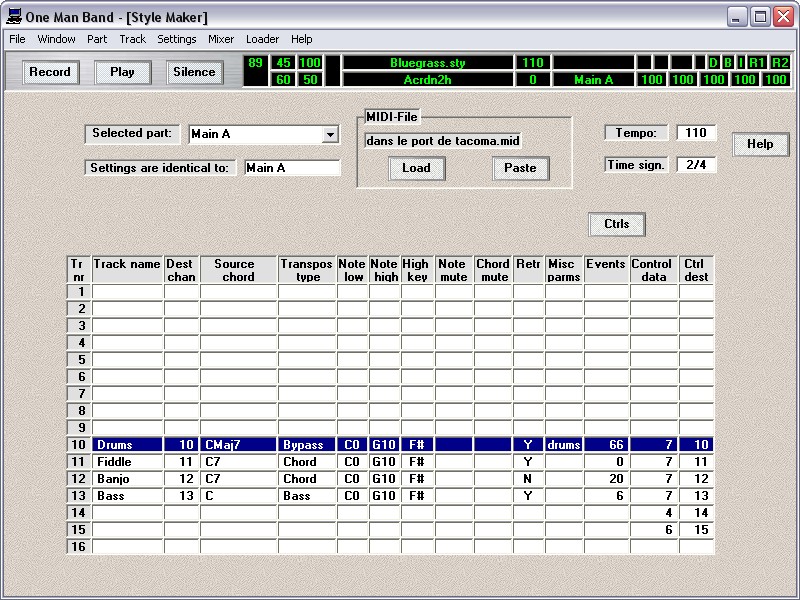
The stylemaker window let's you edit and create styles that can be played in OMB. They can also be loaded in Yamaha PSR and Tyros keyboards and XG-Works. A style mainly consists of a MIDI file divided in to a number of parts or variations. The first part is the Control Area. This is where the synthesizer setup data is kept, patch events to choose instruments on each channel and controller events to set the volume and such. The MIDI data in the other parts is used to play the accompaniment in each variation that is available in the style. There are up to four Main variations (A, B, C and D) that is repeated constantly while playing. Each can have a associated Intro and Ending and there can be one or more Fill ins. The Fill ins and Intro's are played only once before continuing with the Main variation. The MIDI events can be displayed and edited by double clicking on the "Events" or "Control data" column. It can also be played and recorded for each track and each part separately.
Beside the MIDI data in a style there is also additional data to define how this is to be played and transposed in different chords. This data is called the CASM. The definitions of the CASM can be edited in the various colums of the stylemaker window.
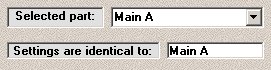
The stylemaker window operates on one part of the style at a time. After loading a style with menu "File/Open style" you can select a part from the partname list labeled "Selected part". The definitions in the CASM are often shared by several parts. This is indicated in the "Settings are identical to" field. If you change settings in a part you must keep in mind that the settings will change in other parts as well. If the part name in the "identical" field is the same as the selected part name than the settings are not shared with other parts. The shared data includes data in all columns except the "Events" and "Control data" column.
![]()
There are a maximum of 16 tracks in a style. It is good practise to only use channels 9-16 for the accompaniment. This means that some tracks may be assigned to the same channel in which case each of those tracks will only be played with selected chordtypes. Be aware that although there are 16 channels in MIDI and 16 tracks in styles, the channel of a track does not need to be the same as the tracknumber. The channels used are commonly 9 and 10 for percussion, 11 for bass and 12-16 for other instruments.
Double click on any of the columns to edit its value(s). The track name is an 8 character long description of this track. The destiny channel defines on which MIDI channel this track will be played.
The Souce chord defines the chord in which the track is recorded. In most cases the notes played in a track will all be fitting in this chord and very often this chord will be CMaj7. So the notes C, E, G and B are what most of the tracks are filled with.
The transposition type indicates how the notes in an event are transposed when different chords are played. Use "Bass" for the bass instrument, "Bypass" for drums and for intro's and endings containing a melody and "Chord" in all other cases.
Note low and Note high specify in which range the notes must stay after transposition.
High key indicates wether a note will be higher or lower after transposition. If a played chord is higher then the high key, then the notes will be raised to the new chord and then lowered an octave.
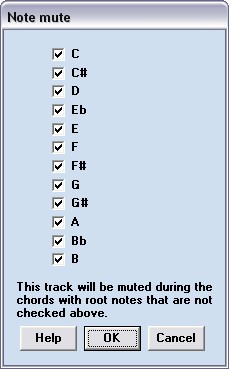
Double clicking on the Note mute column will display a selection window for the chord root notes with which this track will be played. Usually there is another track with the same destiny channel and complimentary Note mute selection that will be played with all other chords. This is for adding some variety to the accompaniment. If there is no extra track with the same destiny channel then all notes should be checked in this window or the track will mute with certain chords.
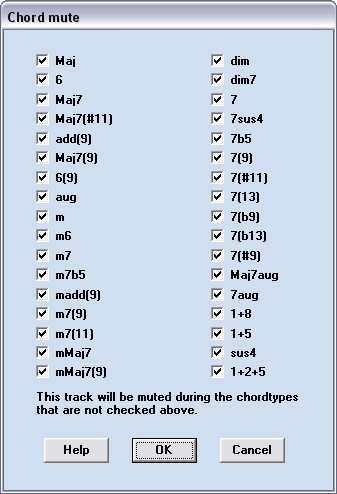
Double clicking on the Chord mute column will display a selection window for the chord types with which this track will be played. Usually there is another track with the same destiny channel and complimentary Chord mute selection that will be played with all other chordtypes. Like the Note mute option this is for adding variety, keep all chordtypes checked is there isn't another track with the same destiny channel.
Retrigger rule (Retr) defines what happens to notes that are still sounding (between note-on and note-off) when a chord change occurs. With option Stop these notes will end. With option retrigger they will get a note-off at there first pitch and a note-on at there new pitch. For instruments with a sharp attack like piano and guitar, retrigger may give undesirable effects. Long sounding instruments with little attack like strings and flute can always be retriggered. You can avoid these problems by playing the chord change close to the end of the measure (just before the red beat indicator lights up). In One Man Band all the options other than stop are treated the same as retrigger.
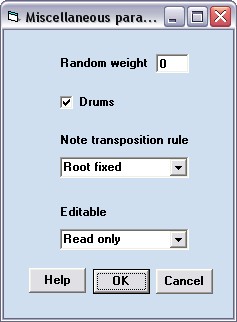
Miscelaneous parameters (Misc).
You can add variety to a style by making different versions of a track and let the random weight value decide how often this track is played instead of other tracks with the same destiny channel. This works only if the style is played in OMB and not when it is played on a Yamaha keyboard or in XG-Works. If no random weight is specified then the track is played all the time.
Select the Drums option if this is a percussion track. The drums on/off switch and drums volume control in OMB will apply to this track.
Note transposition rule:Indicates wether the notes are transposed or not. Drum tracks should be "root fixed" all other tracks should be "root trans".
The parameter Editable is not used in One Man Band.
Double click on the Events column and a menu will popup with a choice for the eventslist and the pianoroll to edit the notes and other events in this track.
Double clik on the Control data column to edit the instrument settings in an eventslist.
The destination channel for the control data is kept separately of the destination channel in Yamaha styles. Checking and correcting these may repair unwanted and unpredictable results often found in styles converted from non-Yamaha keyboards.
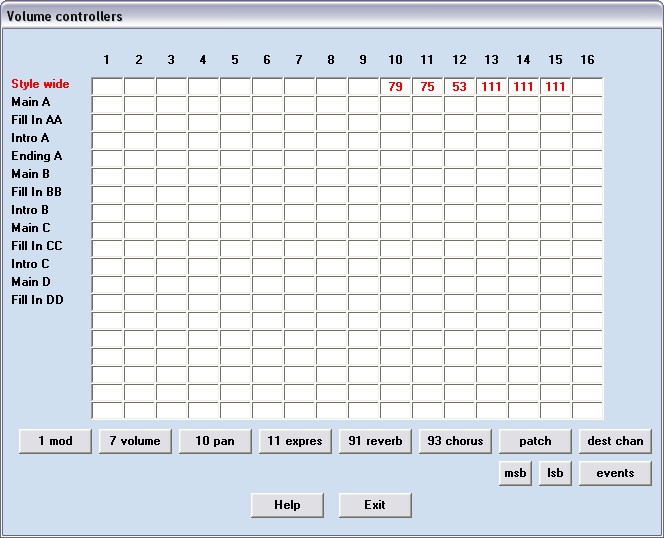
Press the Ctrls button to get a quick overview of how the patch and controller events are placed in the style parts. This is a usefull exercise to clean up styles that sound odd. The attention of the controll area in a style is to place all the patches and controllers there to be valid "Style wide". Some complex styles may intentionally use different instrumnents on the same channel in different parts. In that case it is necessary to send the patch and controllers on that channel again in each part. But more often the instruments are fixed on each channel and still the same patch and controllers are send at the start at each part. Specially when you have an older type synth this may cause an audible delay.
The controllers window shows all the 16 tracks in the columns and all the parts in the rows. This way you get a complete view of all controllers of a selected type in the style. Use the buttons to switch to different controller types. You can also show the destiny channels and the number of events. When you double click on a value then the selected value will move to the "Style wide" row at the top (the control area) and the values in all other parts in this track will be removed.
The buttons in at the top are used for playing and recording. The play button will play the selected track in the current part one time.
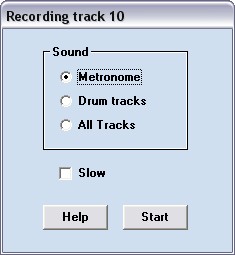
The record button will show a window with a selection option for the sound that will be heared while you are recording. It can be metronome ticks, the drum tracks or all tracks. Check the option "Slow" if you want to record at half speed, making it easier to play accurate. After pressing the start button you will first hear 4 metronome ticks with low pitch counting before the recording. After that the metrome ticks will sound with high pitch or tracks will play indicating the recording has started. When the part has completely played all the bars that are in it, then it will repeat from the start. You can play several takes after each other. When you press the Stop button in the Main control (the same as the Start button) then only the last take will be saved. The last take is the last take that has recorded events in it. So if you think you finally played it right then stop playing and press the Stop button. The restart of the part is indicates by the red and green beat indicators in the main display. One green indicator means start of beat. One red indicator means start of bar (measure). Both a red and green indicator at the same time means start of part. If you want to keep the result of the last take then be sure to release all keys before the part restarts.