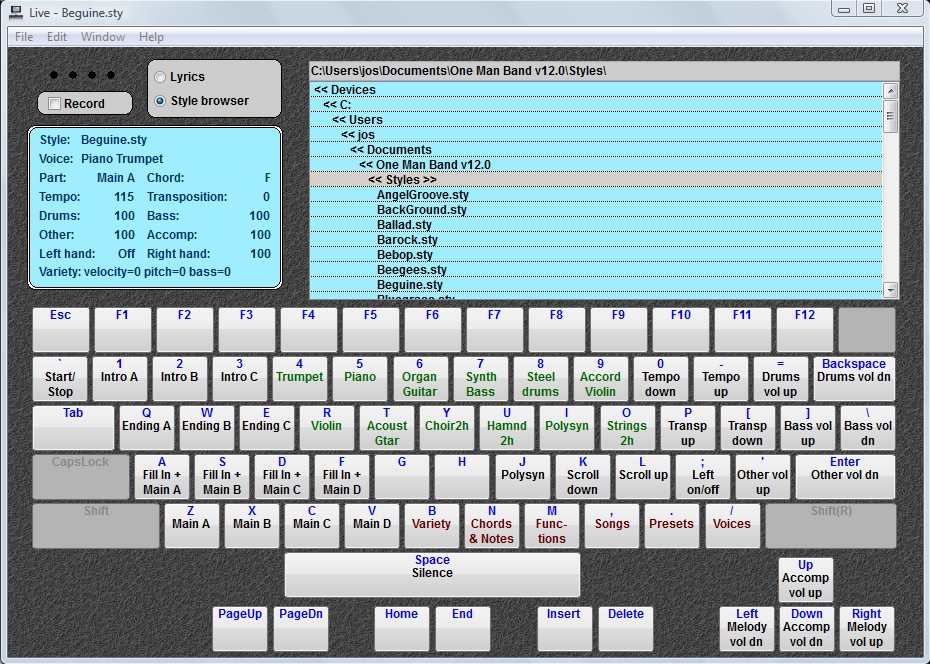
Live: Customising the interface
In the Live window, the lower part of the screen shows the
actions. If you click on one of the red actions, a new menu
with actions will show.
Click on "Variety" or press "B".
A new set of actions will appear. There are plenty of empty
keys here, so we will use this menu to do some experiments.
Right click on the "Z" button.
A list will popup where you can select what kind of action
you want to assign to this key.
Select "Assign to Function".
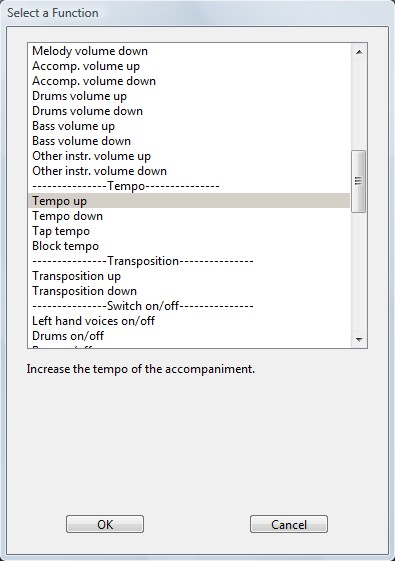
A window will popup where you can select a function.
Find the group with the heading "-----Tempo----"
and click on "Tempo Up".
A description of this function will be shown in the lower
part of the window.
Click on OK.
The label "Tempo Up" is now visible on the Z
button.
Click on it or press the "Z", you will see that the
value of the tempo in the upper left part of the window,
increases.
Now right click on the "X" button and select "Assign
to voice".
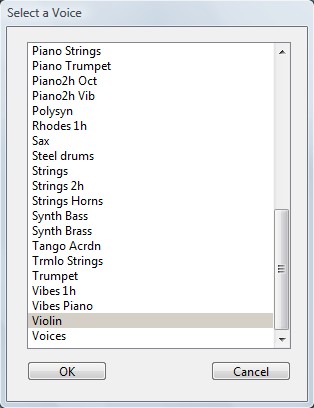
Select "Violin" and click on OK.
The label "Violin" is now visible on the
"X" button.
Click on it or press the "X" button, the voice in
the upper left part of the window will now show
"Violin".
Right click on the "C" button and select "Assign
to preset".
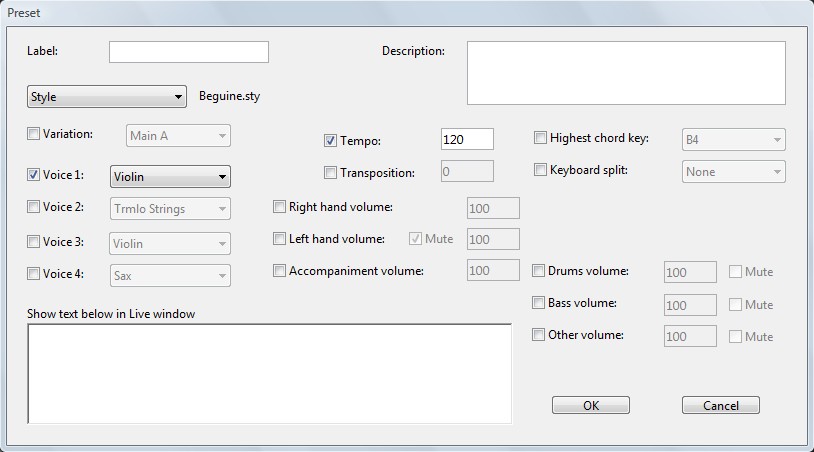
The window shows the current style, multivoice and tempo.
These will be activated when you select this preset in the
future. Other properties are blurred out, they will stay
unchanged when you activate the preset. You can enable these
properties by clicking on the checkmark. Keep in mind that
any property that is activated in a preset, will stay the
same when you choose a preset where this property is not
enabled. To set things back to normal in other presets, you
can enable the changed property in all other settings too. A
more convenient method would be to make a
"generic-reset" preset that sets everything back to
normal. You can add an "X" at the end of a preset
that changes special properties. That would be a warning
"Cleanup after use", use the
"generic-reset" preset before activating the new
preset.
Type "Test Preset" in the label and press OK.
The label "Test Prest" is now visible in the
"C" button.
Click on a style in the upper right part of the window.
See how the name of the style in the upper left window is
changed.
Now click on the "C" button.
Notice that the name of the style is changed back to what it
was when you defined the preset. Remember if you want to edit
this preset in the future, you must first left click to
activate it before you right click it. Otherwise it is
assumed that you want to assign the current properties to the
preset.
Right click on the "V" button and select "Assign
to menu".
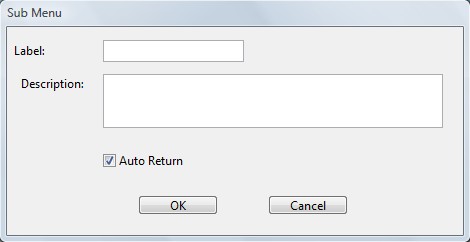
Type "Test Menu" in the label.
Uncheck the Auto Return option or you will return to the main
menu each time you choose a action in this menu.
Click on OK.
You will now have an empty menu on screen, with only the
Escape key defined for "Exit menu".
Right click on the "1" button, select "Assign
to Function", click on "Start/stop"
(under ---Variations---) and click on OK.
Right click on the "2" button, select "Assign
to Chord", don't change anything, just click on
OK.
Right click on the "3" button, select "Assign
to MIDI message". Type "Test
message".
In the label. In the text labeled "MIDI data sent with
key/mouse down" type: 90 4f 7f
In the label. In the text
labeled "MIDI data sent with key/mouse up" type: 80 4f 7f
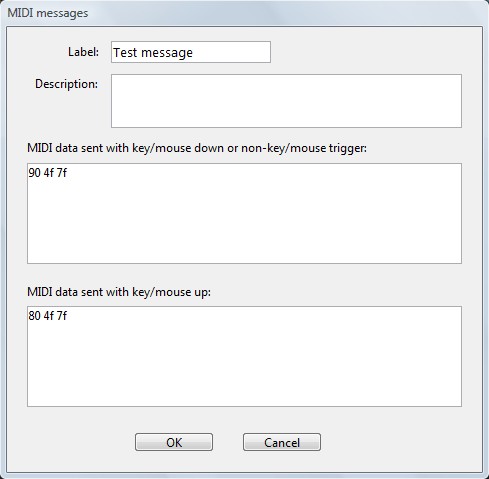
Click on OK.
Now when you click on button "3" a Note-On MIDI
message is sent on channel 1 and a Note-Off message when you
release the mouse.
You can combine any number of MIDI messages in one long
string.
For example f0 7e 7f 09 01 f7 C0 00 b0 07 7f consists of:
A system exclusive message "f0 7e 7f 09 01 f7"
meaning GM reset or GM on.
A program change "C0 00" selecting a piano on
channel 1.
A controller message "b0 07 7f" setting the volume
on channel 1 to maximum.
To find out more about available MIDI message, check the
manual of your synthesizer.
The sub menu that you have created will now look like this:
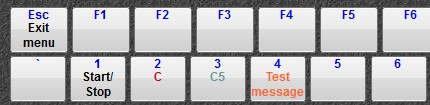
Click on "Exit menu".
Right click on the Test menu at the "V" button and
select "Cut Action".
Now right click on the "B" button and select
"Paste Action".
The Test Menu is now at the "B" button.
Now use the Cut Action to remove the actions you added to
buttons in this tutorial..